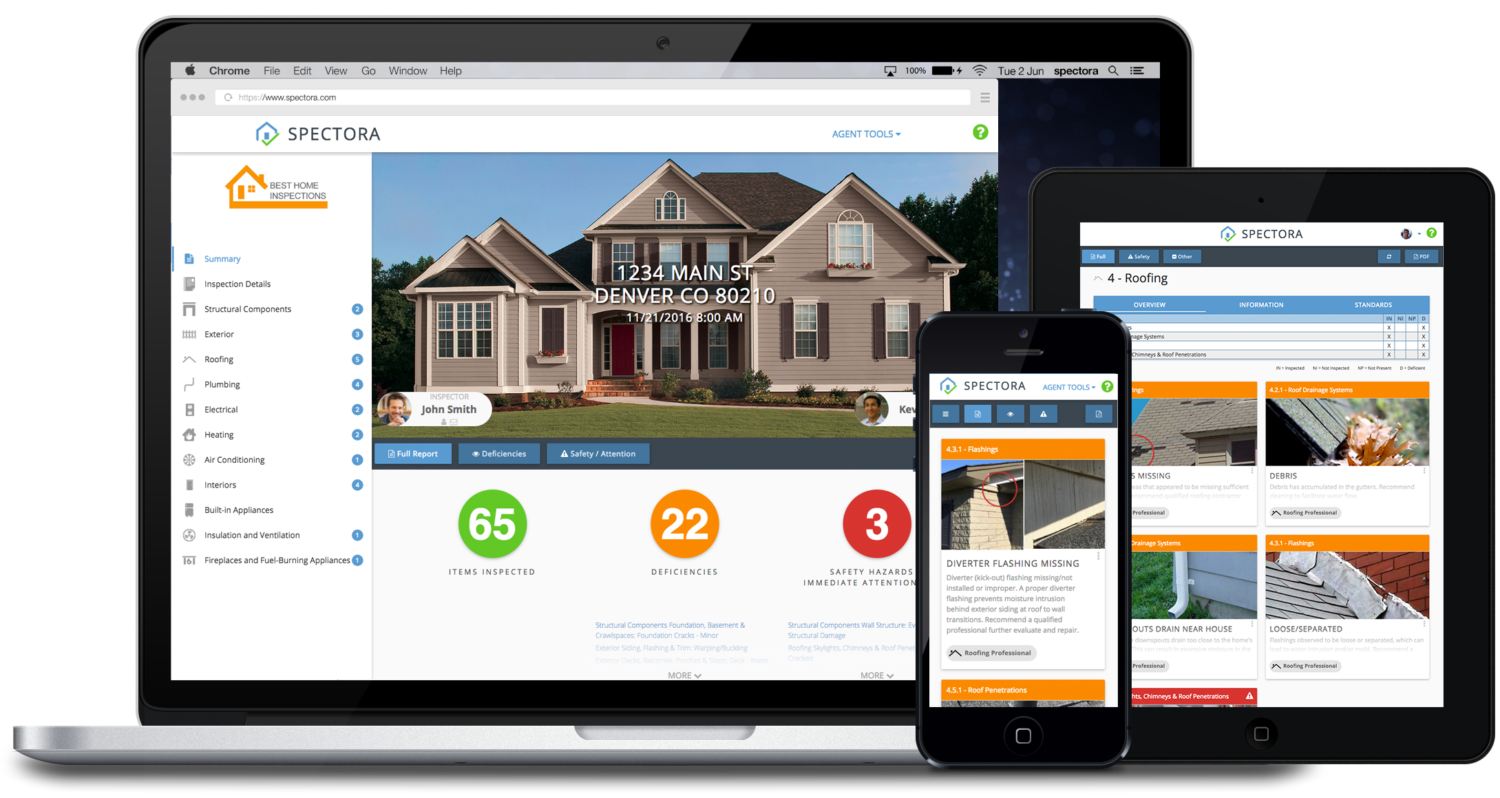
Getting Started with Spectora Checklist
Contents
More of a video person? Check out our Spectora Startup Series below:
Download the iOS or Android App on Your Mobile Device
Download the Android version here
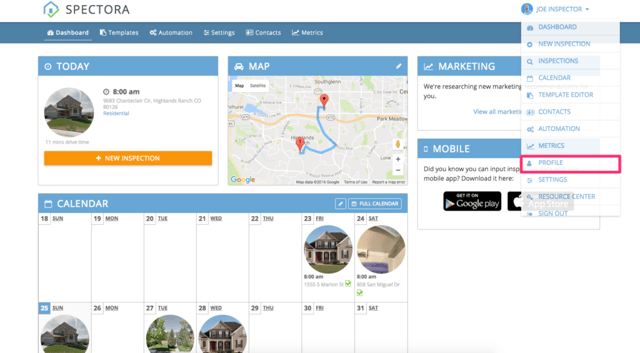
Fill Out Your Basic Profile Information
Filling out your profile gives Google another industry source of information about your business. This helps your local SEO presence by giving Google more confidence to rank you when someone searches for a home inspector in your local area.
From your Spectora dashboard, click on the drop down menu at the top right, click on profile.
Pro Tips:
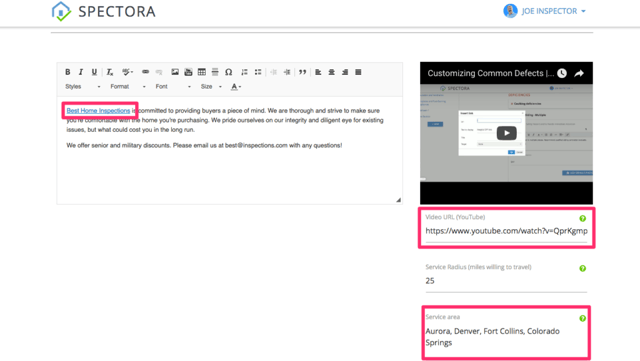
- List your target cities in your Service Areas
- Add a YouTube video
- Link to your home page from the business description section
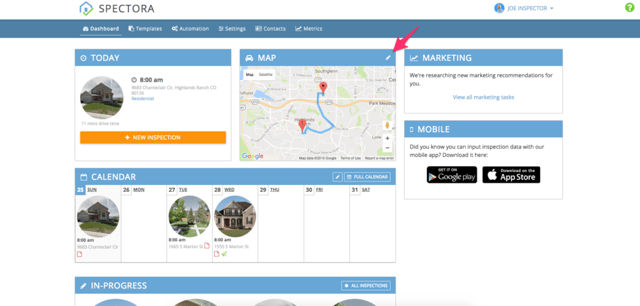
Edit Your Starting Address for Driving Directions
This will enable you to see how far each inspection is and make pulling it up in your maps app a breeze on inspection day.
Customize Your Inspection Agreement
Go to Settings>Inspection Agreements to edit our base Inspection Agreement, or create a new one.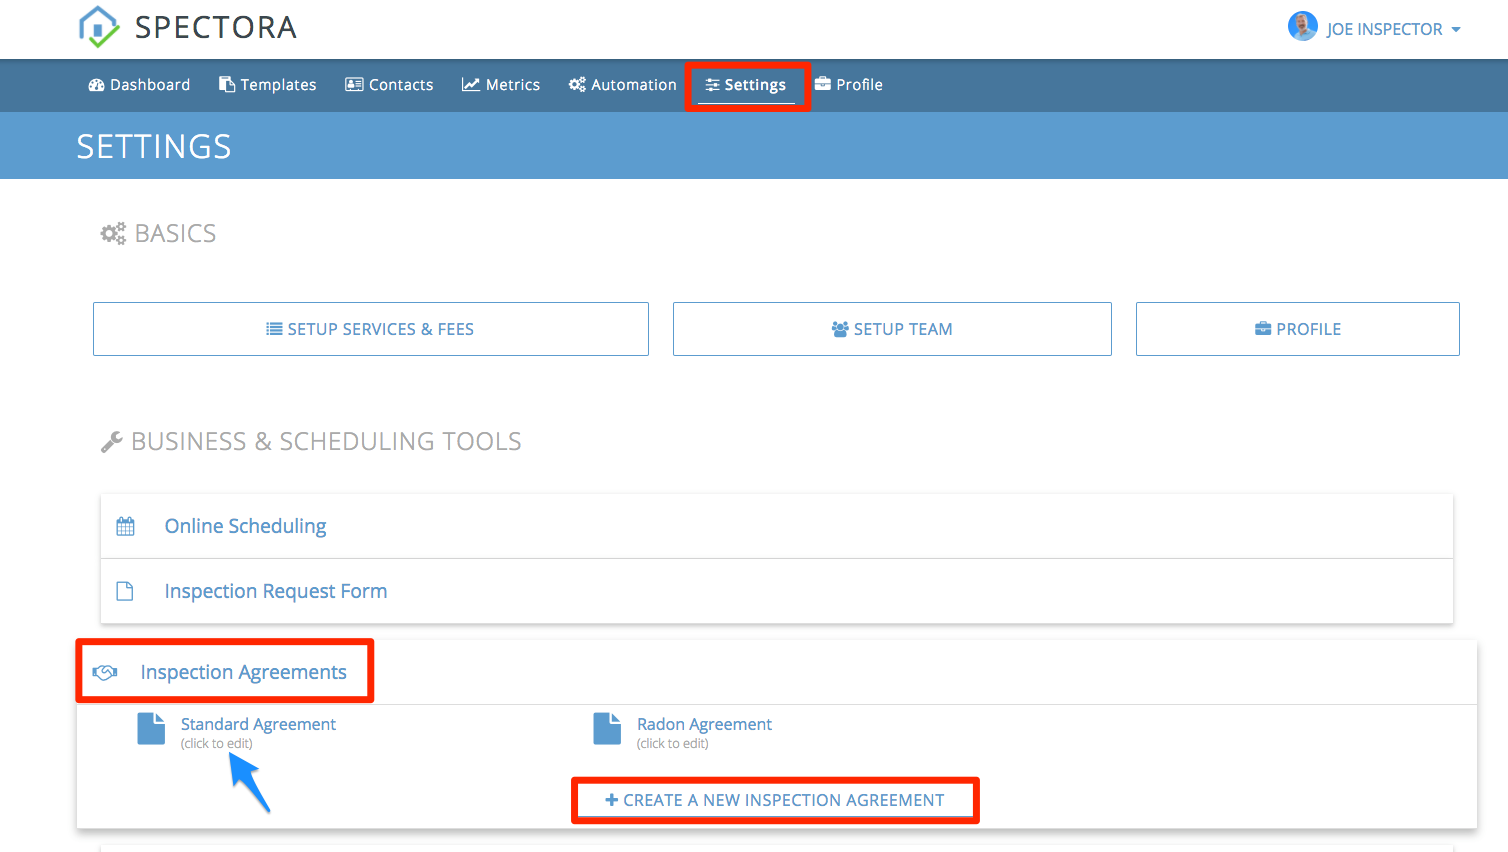
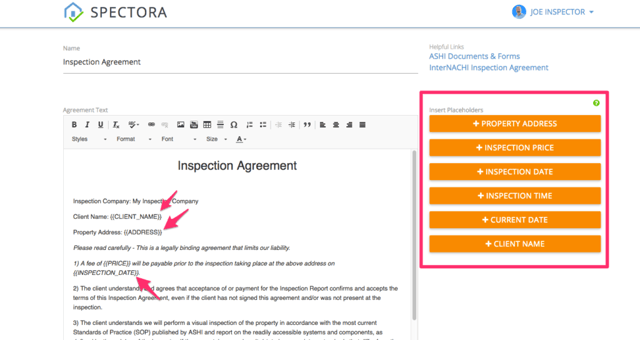
To customize your Inspection Agreement, you simply copy/paste your text in and insert placeholders by clicking on them when your cursor is where you want information to populate. Here is an example:
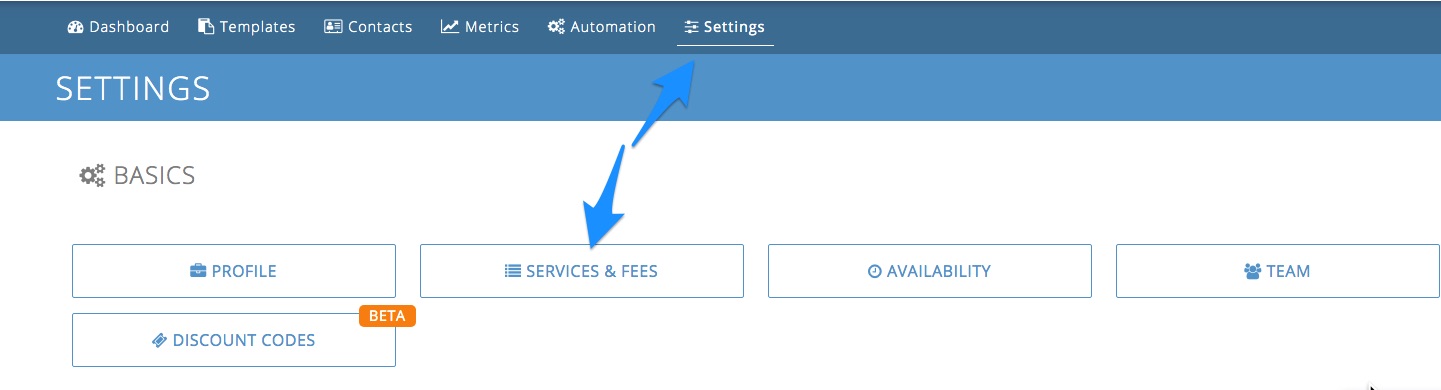
Set Up Your Fees
Go to Settings > Setup Services & Fees to add your base inspection pricing, duration and add-ons.
Set Up Your Payments
- Go to Settings->Payments
- Select "Spectora Payments" as your processor
- Click the green "Set Up Payments" button

4. Fill out your details

That's it! You're now able to receive payments for your inspections.
Note that after you do $1k in transactions you'll get an email to add more details like your SSN. Be sure to fill those out when prompted to keep your payouts coming!
See more info related to payments like getting paid online, pay on site, and issuing refunds here.
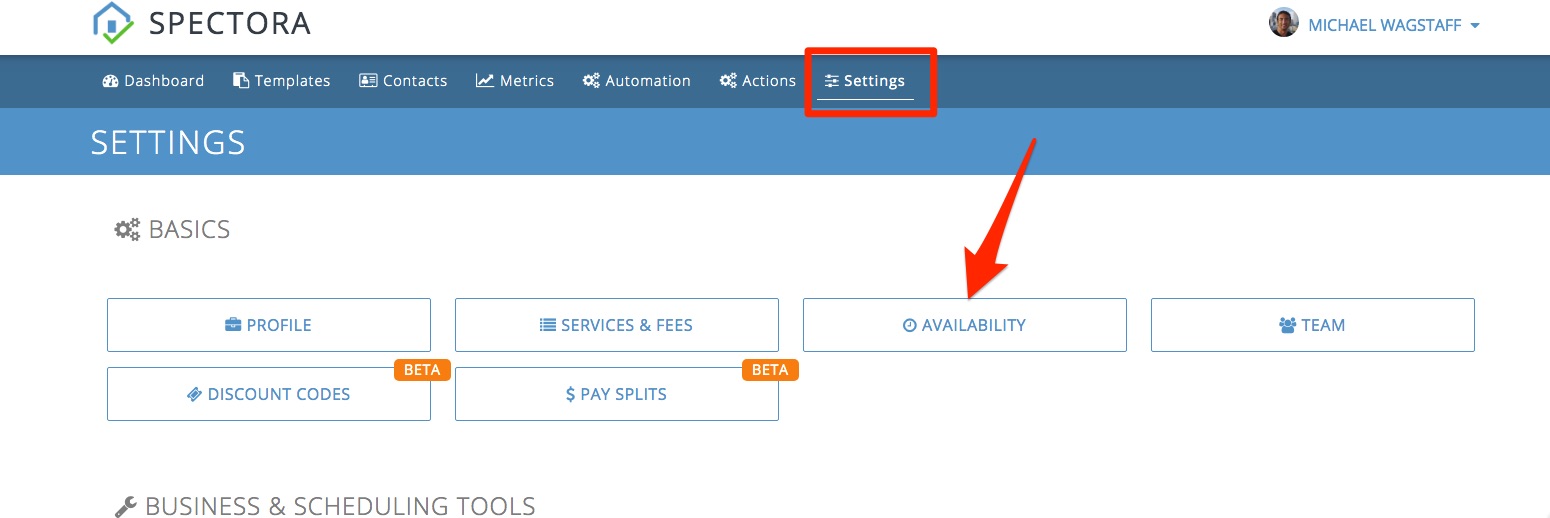
Set Your Schedule & Availability
This is where you can decide between open scheduling or time slots.
Note: This is what will show as available on your online scheduler. You can still schedule yourself but you'll get a warning notification.
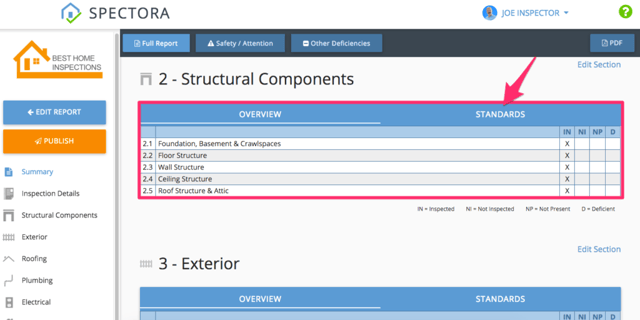
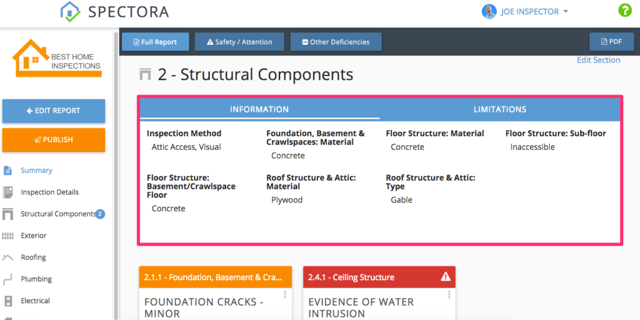
Customize Your Base Template
This is where you can modify anything in your template.
When you create an inspection, this is what "stamps out" on the day of the inspection.
You can also add, delete, duplicate, move, change names or re-order your sections, items or defects.

1) The pencil icon allows you to edit the language of each section or item.
2) The duplicate icon duplicates the section, item or comment for quick building out of your template.
3) The move icon allows you to move an item or comment to another section or item.
4) The trash can allows you to delete any section, item or comment you don't want in your template.
5) The re-order icon allows you to click and drag sections or items to re-order them. For comments, just click and drag anywhere in the card.
6) The "+New" button allows you to create new sections, items or comments and decide if you want them in each new inspection or available as an optional add-on.
Test Out Creating and Customizing a Defect in Your Template
This will help you get comfortable with the flow of Spectora's template editor.
*Keep in mind you can always start a template from scratch or clone our ASHI or NACHI base templates

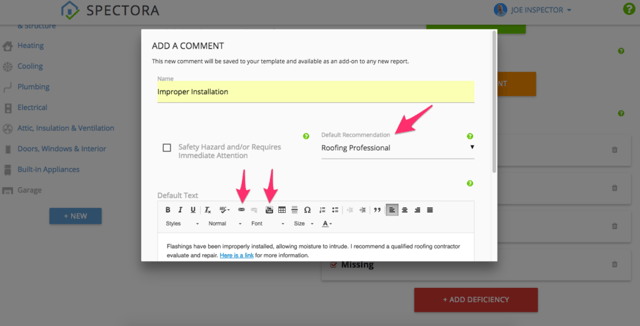
Once you've clicked on a section and item (Roof>Flashings in this example), you can scroll down to where you can add a new defect (or informational items or reasons for not inspected).
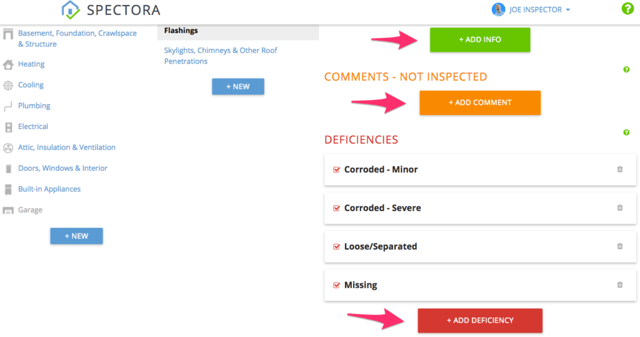
Name your new defect, select the default professional they should consult with, and any custom comments that you want to auto-populate when you select this defect in the future. You can add useful links to really provide helpful resources to clients and agents.
Explore the ways you can make your template yours. Let us know if there is something you'd like to see!
Customize Your Report Display Options
Not a fan of the grid style layout? Want to include the Standards of Practice in an attachment instead of in the report?
Go into your Template and click on the name of the template and uncheck either or both. And poof, they're gone!
And now you have your non-grid layout, narrative style home inspection report.
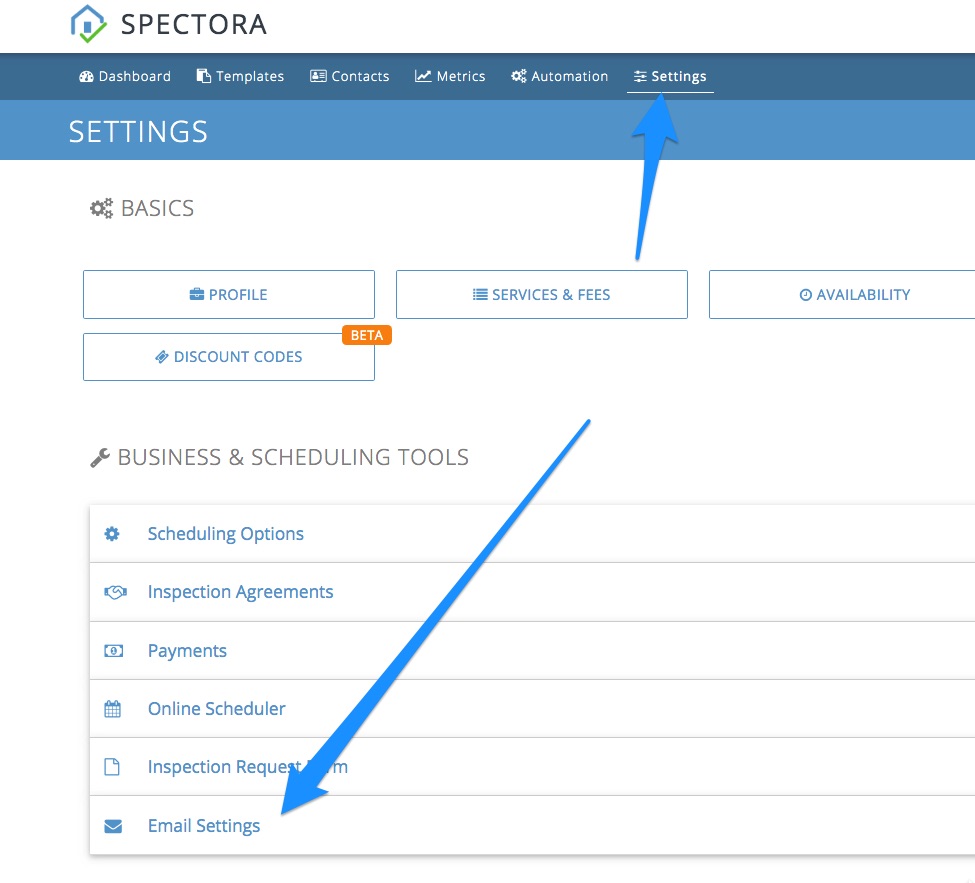
Customize your email header/footer
You’ll want to make sure to customize your email header and footer to your liking.
You can find this in Settings>Email Settings.
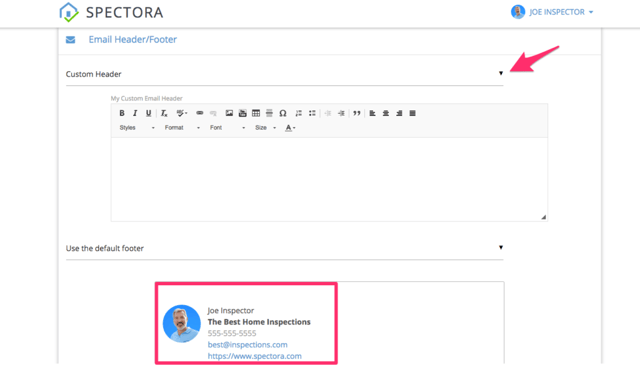
Your default header and footer will be pulled from the image and info you provide in your profile settings. You can customize by clicking the drop down and selecting “Custom Header” and “Custom Footer”.
Customize Your Automated Emails
Customize Your Inspection Confirmation Emails
Cut down on miscommunications and showcase your professionalism with automated confirmation emails to clients and agents.
These are in Automation>Scheduling. These are what go out when you schedule an inspection.
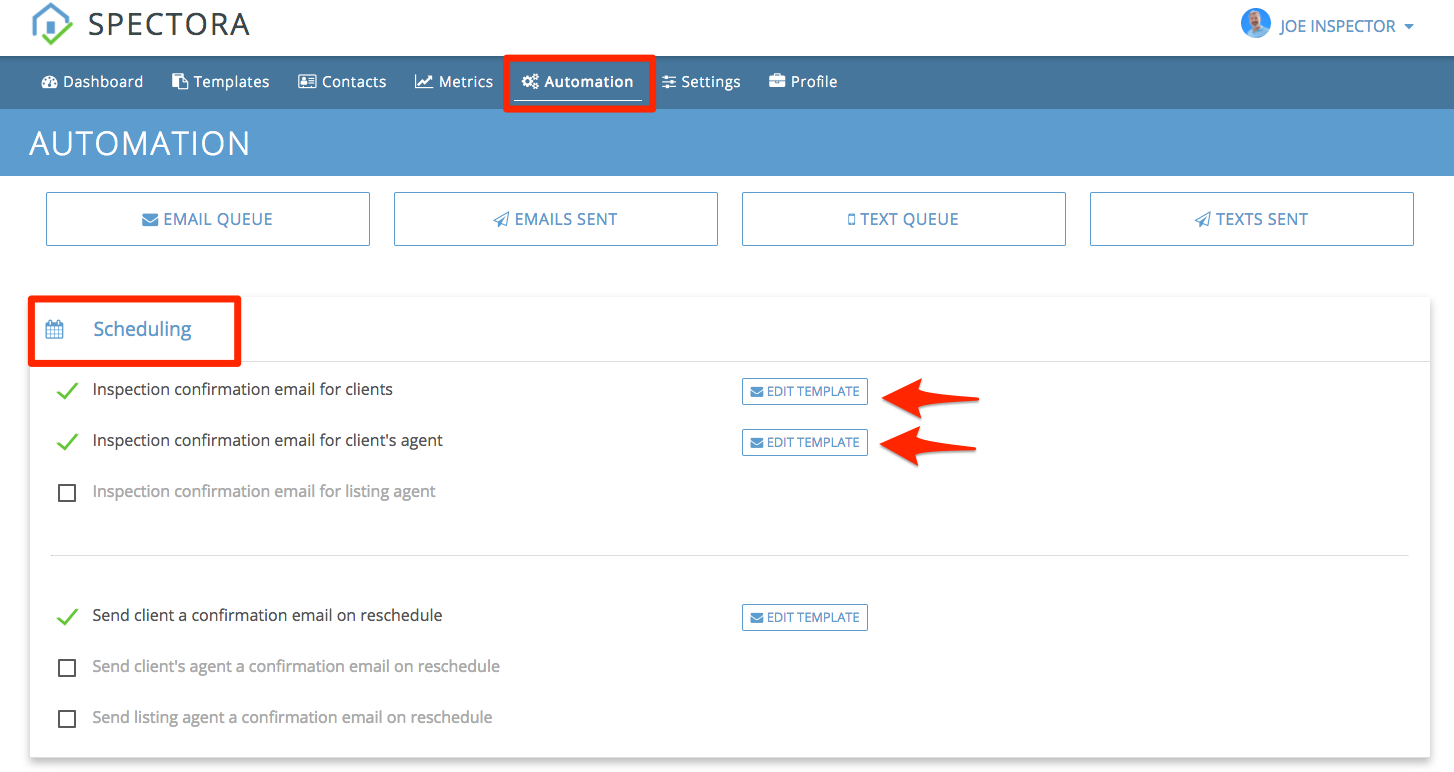
Here you can customize your confirmation emails with placeholders (address, date, client name, etc) to make each email personalized while saving you time.
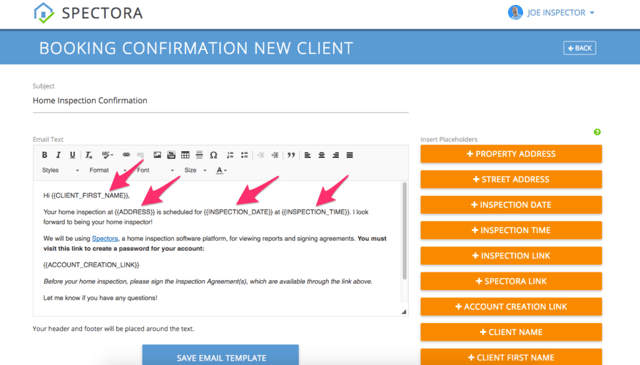
These inspection confirmation emails will go out within hours of booking the inspection so clients and agents can put it in their calendars right away, minimizing errors and schedule conflicts.
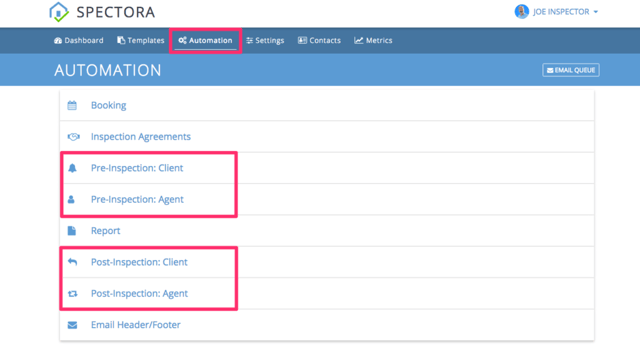
Customize Your Inspection Reminder and Follow-up Emails
This is where you can really impress clients and agents with your professionalism.
Customize client reminder emails at any time increments you prefer, and include resources, links or set expectations. Customize agent reminder emails to show them their clients are in good hands when they refer an inspection to you.
Post-inspection follow up emails are where you can provide more value and earn more referrals.
Customize client follow up emails to see if they have any questions or provide resources to stay top of mind. Customize agent follow up emails to thank them, provide resources to their clients or offer specials deals and updates. Make sure to add links to leave you a review.
Add Real Estate Agents to Your Contacts Database
This is important for staying top of mind with agents by sending one-off emails or mass communications. This will also keep your business metrics accurate when you mark which agent each referral is from.
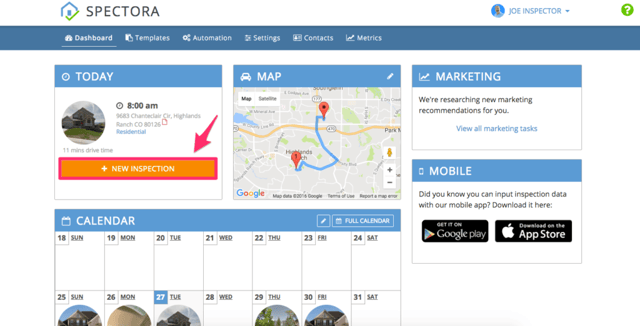
Create a New Inspection
When you login for the first time, you'll have a sample inspection set up for that day that you can get comfortable with.
To create an inspection as you would with a new client, click on the orange "+New Inspection" button.
Next, enter in an address and zip (Property details will pop up on the right from Zillow and Google if it's a valid address).
Enter in a date, client info, template, price, referral source, and agent (this will help you easily track best referral sources, top agents, etc. in your Metrics section of your dashboard).

If it's a new agent that referred you, click the "Add New Agent" button to add them to your Contacts Database.
Click save inspection then you're ready to import the inspection on your mobile device!
Importing an Inspection on Your Mobile Device
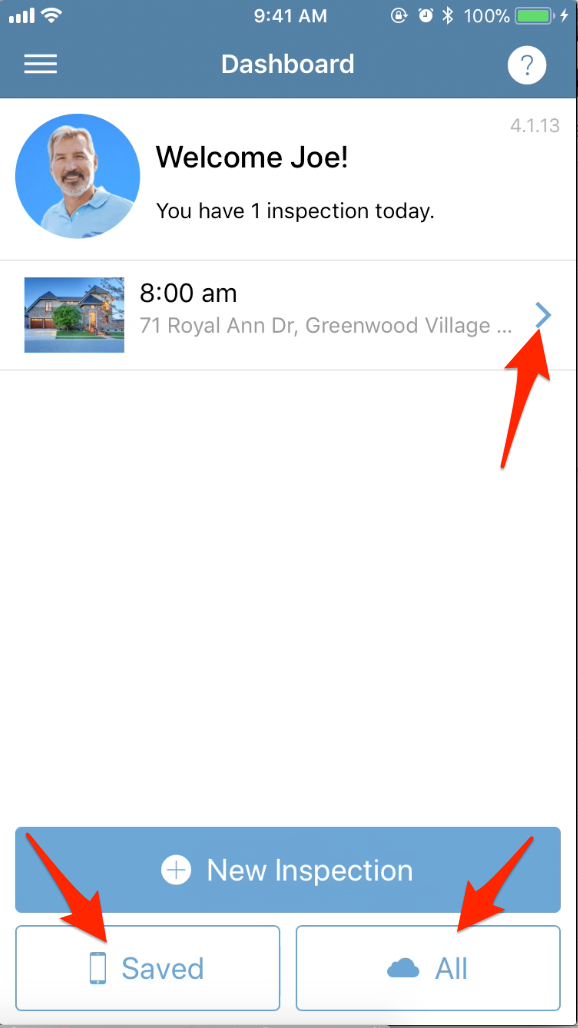
Once you create an inspection on your desktop, then you can import it on your mobile app. (Note: You don't have to create the inspection on your desktop, you can create an inspection straight from the app if you prefer)
When you land on your mobile dashboard today's inspections will automatically import from the cloud.
You can also view future inspections by hitting "All" or see inspections in progress by tapping "Saved".
Know Your Resources for Learning